Styling Text
ပြီးခဲ့တဲ့ chapter 3 မှာ CSS နဲ့ ပတ်သက်ပြီးတော့ သိသင့်သလောက် သိပြီးလောက်ပါပြီ။ ဒီ chapter မှာတော့ Text တွေကို အရောင်ပြောင်းခြင်း နောက်ပြီးတော့ စာလုံး အရွယ်အစား ပြောင်းတာတွေကို ပြောပြပေးသွားပါမယ်။
Changing Font Size
ကျွန်တော်တို့တွေ စာလုံးပုံစံကို အောက်က ပုံမျိုးလေး ဖြစ်အောင် လုပ်ကြည့်ရအောင်
Figure 4-1
အထက်ပါ ဥပမာမှာ စာလုံးတွေက ပုံမှန် ထက်ကြီးထားတာကို တွေ့နိုင်ပါလိမ့်မယ်။ အဲဒီအတွက် ကျွန်တော်တို့တွေ CSS မှာ font-size ဆိုတာကို အသုံးပြုရပါတယ်။
HTML code ကို ဒီလိုရေးထားပါတယ်။
<!DOCTYPE html>
<html>
<head>
    <meta charset="UTF-8">
    <title>Styling Text</title>
    <link rel="stylesheet" href="style.css">
</head>
<body>
    <h1>One Piece</h1>
    <p>One Piece is a Japanese shounen manga series written and illustrated by Eiichiro Oda. It has been serialized in Weekly Shōnen Jump since August 4, 1997; the individual chapters are being published in tankōbon volumes by Shueisha, with the first released on December 24, 1997, and the 70th volume released as of March 2013. One Piece follows the adventures of Monkey D. Luffy, a young boy whose body gains the properties of rubber after unintentionally eating a Devil Fruit, and his diverse crew of pirates, named the Straw Hat Pirates. Luffy explores the ocean in search of the world's ultimate treasure known as One Piece in order to become the next Pirate King.</p>
</body>
</html>
အဲဒီမှာ external style sheet ဖြစ်တဲ့ style.css ကို ခေါ်ထားတာကို တွေ့နိုင်ပါတယ်။ အဲဒီ style.css ထဲမှာတော့
h1 {
    font-size: 40px;
}
h1 ရဲ့ font size ကို ကျွန်တော် 40px ပေးထားပါတယ်။ ဒါကြောင့် ပုံမှန် h1 ထက် ကြီးနေရတာပါ။
font size ကို points (pt), pixels (px), millimeters (mm), centimeters (cm), inches (in), picas (pc), x-height (ex), သို့မဟုတ် em space (em) စတာတွေကို အသုံးပြုနိုင်ပါတယ်
ဒါ့အပြင် (xx-small, x-small, small, medium, large, x-large, or xx-large) တွေကိုလည်း အသုံးပြုနိုင်ပါတယ်။
Indent Text
အခု ထပ်ပြီးတော့ ကျွန်တော်တို့တွေ text indent ကို ပြင်ရအောင်။ paragraph မှာ စာ အစ index ကို ပြင်ပါမယ်။
style.css ကို ဒီလို ထပ်ပြင်လိုက်ပါမယ်။
h1 {
    font-size: 40px;
}

p {
    text-indent: 20px;
}
အဲဒီ အခါ text က အောက်ကလို ဖြစ်သွားပါမယ်။
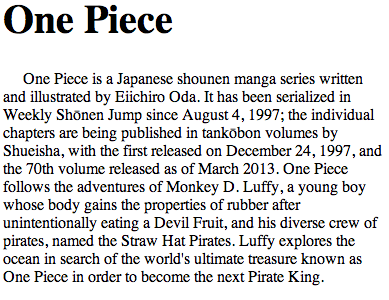
Figure 4-2
Change the Color of Text
Text Color ပြောင်းဖို့အတွက် color ဆိုတာကို အသုံးပြုရပါတယ်။
h1 {
    font-size: 40px;
}
ဆိုတာ ကို ဒီလို ပြောင်းလိုက်ပါမယ်။
h1 {
    font-size: 40px;
    color: green;
}
အဲဒီ code မှာ color ဆိုတာ ကို တွေ့ပါလိမ့်မယ်။ အဲဒီ code ကို run လိုက်ရင် အောက်ကလို မြင်ရမယ်။
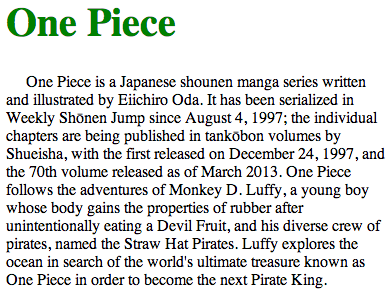
Figure 4-3
အဲဒီမှာ ခေါင်းစဉ် အရောင်က အစိမ်းရောင် ဖြစ်သွားတာကို တွေ့လိမ့်မယ်။ ကျွန်တော်တို့ h1 ရဲ့ color ဟာ green ပါဆိုပြီး ရေးခဲ့တာကြောင့်ပါ။ color နာမည်တွေ အပြင် ကျွန်တော်တို့ အသုံးများတဲ့ Hexadecimal Code ကို ပါအသုံးပြုလို့ရပါတယ်။
h2 {
    font-size: 25px;
    color: #336699;
}
အဲဒီ code လေးကို လက်ရှိ CSS မှာ ထပ်ဖြည့်လိုက်မယ်။ HTML မှာလည်း h2 ကို ကျွန်တော်တို့တွေ ထပ်ဖြည့်လိုက်ပါမယ်။ အဲဒီ အခါ HTML code က အောက်ကလို ဖြစ်သွားလိမ့်မယ်။
<!DOCTYPE html>
<html>
<head>
    <meta charset="UTF-8">
    <title>Styling Text</title>
    <link rel="stylesheet" href="style.css">
</head>
<body>
    <h1>One Piece</h1>
    <h2>by Eiichiro Oda</h2>
    <p>One Piece is a Japanese shounen manga series written and illustrated by Eiichiro Oda. It has been serialized in Weekly Shōnen Jump since August 4, 1997; the individual chapters are being published in tankōbon volumes by Shueisha, with the first released on December 24, 1997, and the 70th volume released as of March 2013. One Piece follows the adventures of Monkey D. Luffy, a young boy whose body gains the properties of rubber after unintentionally eating a Devil Fruit, and his diverse crew of pirates, named the Straw Hat Pirates. Luffy explores the ocean in search of the world's ultimate treasure known as One Piece in order to become the next Pirate King.</p>
</body>
</html>
အဲဒီ code လေးက browser မှာ အောက်ကလို ပေါ်ပါလိမ့်မယ်။
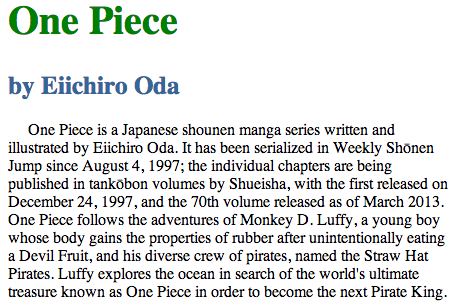
Figure 4-4
Color ကို Hex value (#RRGGBB) နဲ့ color name ၂ မျိုး လုံး ထည့်လို့ရပါတယ်။ အောက်မှာ ဥပမာလေးတွေ နဲ့ ပြထားပါတယ်။
| Color Name | HEX | Color |
| AliceBlue | #F0F8FF | |
| AntiqueWhite | #FAEBD7 | |
| Aqua | #00FFFF | |
| Aquamarine | #7FFFD4 | |
| Azure | #F0FFFF | |
| Beige | #F5F5DC | |
| Bisque | #FFE4C4 | |
| Black | #000000 | |
| BlanchedAlmond | #FFEBCD | |
| Blue | #0000FF | |
| BlueViolet | #8A2BE2 | |
| Brown | #A52A2A | |
| BurlyWood | #DEB887 | |
| CadetBlue | #5F9EA0 | |
| Chartreuse | #7FFF00 | |
| Chocolate | #D2691E | |
| Coral | #FF7F50 | |
| CornflowerBlue | #6495ED | |
| Cornsilk | #FFF8DC | |
| Crimson | #DC143C | |
| Cyan | #00FFFF | |
| DarkBlue | #00008B | |
| DarkCyan | #008B8B | |
| DarkGoldenRod | #B8860B | |
| DarkGray | #A9A9A9 | |
| DarkGreen | #006400 | |
| DarkKhaki | #BDB76B | |
| DarkMagenta | #8B008B | |
| DarkOliveGreen | #556B2F | |
| DarkOrange | #FF8C00 | |
| DarkOrchid | #9932CC | |
| DarkRed | #8B0000 | |
| DarkSalmon | #E9967A | |
| DarkSeaGreen | #8FBC8F | |
| DarkSlateBlue | #483D8B | |
| DarkSlateGray | #2F4F4F | |
| DarkTurquoise | #00CED1 | |
| DarkViolet | #9400D3 | |
| DeepPink | #FF1493 | |
| DeepSkyBlue | #00BFFF | |
| DimGray | #696969 | |
| DodgerBlue | #1E90FF | |
| FireBrick | #B22222 | |
| FloralWhite | #FFFAF0 | |
| ForestGreen | #228B22 | |
| Fuchsia | #FF00FF | |
| Gainsboro | #DCDCDC | |
| GhostWhite | #F8F8FF | |
| Gold | #FFD700 | |
| GoldenRod | #DAA520 | |
| Gray | #808080 | |
| Green | #008000 | |
| GreenYellow | #ADFF2F | |
| HoneyDew | #F0FFF0 | |
| HotPink | #FF69B4 | |
| IndianRed | #CD5C5C | |
| Indigo | #4B0082 | |
| Ivory | #FFFFF0 | |
| Khaki | #F0E68C | |
| Lavender | #E6E6FA | |
| LavenderBlush | #FFF0F5 | |
| LawnGreen | #7CFC00 | |
| LemonChiffon | #FFFACD | |
| LightBlue | #ADD8E6 | |
| LightCoral | #F08080 | |
| LightCyan | #E0FFFF | |
| LightGoldenRodYellow | #FAFAD2 | |
| LightGray | #D3D3D3 | |
| LightGreen | #90EE90 | |
| LightPink | #FFB6C1 | |
| LightSalmon | #FFA07A | |
| LightSeaGreen | #20B2AA | |
| LightSkyBlue | #87CEFA | |
| LightSlateGray | #778899 | |
| LightSteelBlue | #B0C4DE | |
| LightYellow | #FFFFE0 | |
| Lime | #00FF00 | |
| LimeGreen | #32CD32 | |
| Linen | #FAF0E6 | |
| Magenta | #FF00FF | |
| Maroon | #800000 | |
| MediumAquaMarine | #66CDAA | |
| MediumBlue | #0000CD | |
| MediumOrchid | #BA55D3 | |
| MediumPurple | #9370DB | |
| MediumSeaGreen | #3CB371 | |
| MediumSlateBlue | #7B68EE | |
| MediumSpringGreen | #00FA9A | |
| MediumTurquoise | #48D1CC | |
| MediumVioletRed | #C71585 | |
| MidnightBlue | #191970 | |
| MintCream | #F5FFFA | |
| MistyRose | #FFE4E1 | |
| Moccasin | #FFE4B5 | |
| NavajoWhite | #FFDEAD | |
| Navy | #000080 | |
| OldLace | #FDF5E6 | |
| Olive | #808000 | |
| OliveDrab | #6B8E23 | |
| Orange | #FFA500 | |
| OrangeRed | #FF4500 | |
| Orchid | #DA70D6 | |
| PaleGoldenRod | #EEE8AA | |
| PaleGreen | #98FB98 | |
| PaleTurquoise | #AFEEEE | |
| PaleVioletRed | #DB7093 | |
| PapayaWhip | #FFEFD5 | |
| PeachPuff | #FFDAB9 | |
| Peru | #CD853F | |
| Pink | #FFC0CB | |
| Plum | #DDA0DD | |
| PowderBlue | #B0E0E6 | |
| Purple | #800080 | |
| Red | #FF0000 | |
| RosyBrown | #BC8F8F | |
| RoyalBlue | #4169E1 | |
| SaddleBrown | #8B4513 | |
| Salmon | #FA8072 | |
| SandyBrown | #F4A460 | |
| SeaGreen | #2E8B57 | |
| SeaShell | #FFF5EE | |
| Sienna | #A0522D | |
| Silver | #C0C0C0 | |
| SkyBlue | #87CEEB | |
| SlateBlue | #6A5ACD | |
| SlateGray | #708090 | |
| Snow | #FFFAFA | |
| SpringGreen | #00FF7F | |
| SteelBlue | #4682B4 | |
| Tan | #D2B48C | |
| Teal | #008080 | |
| Thistle | #D8BFD8 | |
| Tomato | #FF6347 | |
| Turquoise | #40E0D0 | |
| Violet | #EE82EE | |
| Wheat | #F5DEB3 | |
| White | #FFFFFF | |
| WhiteSmoke | #F5F5F5 | |
| Yellow | #FFFF00 | |
| YellowGreen | #9ACD32 |
Change the Font
Font ကို ပြောင်းဖို့ အတွက် font-family: ဆိုတဲ့ property ကို အသုံးပြုရပါမယ်။ အောက်က code လေးကို တချက်ကြည့်လိုက်ပါ။
body {
    font-family: "Zawgyi-One",arial;
}
h1 {
    font-size: 40px;
    color: green;
}

h2 {
    font-size: 25px;
    color: #336699;
}

p {
    text-indent: 20px;
}
body ရဲ့ font ကို Zawgyi-One ပြောင်းထားတာကို တွေ့ရပါလိမ့်မယ်။ "Zawgyi-One",arial လို့ ရေးထားတဲ့ သဘောကျ Zawgyi-One font စက်ထဲမှာ မရှိရင် arial font ကို အသုံးပြုမယ်လို့ ဆိုထားပါတယ်။ comma (,) ကို ခံပြီးတော့ တစ်ခုထက် မက font-family တွေ ထည့်ထားလို့ရပါတယ်။
အဲဒီ code လေးကိုပဲ ကျွန်တော်တို့ ထပ်ပြီး ပြောင်းရအောင်
body {
    font-family: "Zawgyi-One",arial;
}
h1 {
    font-size: 40px;
    color: green;
    font-family: "Times New Roman",serif;
}

h2 {
    font-size: 25px;
    color: #336699;
    font-family: "Verdana",arial;
}

p {
    text-indent: 20px;
}
အထက်ပါ code မှာ h1 ကို Times New Roman သုံးပြီးတော့ h2 ကိုတော့ Verdana သုံးထားတာ တွေ့နိုင်ပါတယ်။ body မှာ Zawgyi-One လို့ ပြောခဲ့တဲ့ အတွက်ကြောင့် တခြား code တွေ အားလုံးဟာ Zawgyi-One font နဲ့ ဖော်ပြနေပါလိမ့်မယ်။ အဲဒီ code လေးကို run လိုက်ရင် အောက်က ပုံလို တွေ့ပါလိမ့်မယ်။
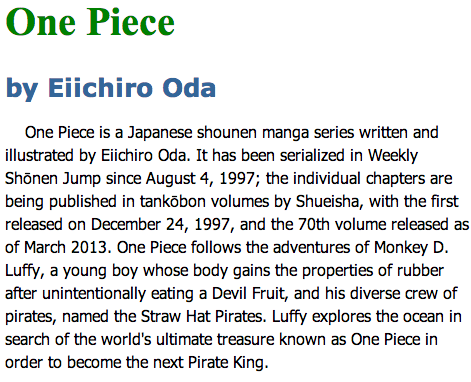
Figure 4-5
Change Text Alignment
Text alignment ကို ပြောင်းဖို့အတွက် text-align ဆိုတာကို အသုံးပြုရပါတယ်။ text-align မှာ left , right , center နဲ့ justify ဆိုတဲ့ value တွေကို ထည့်သွင်းနိုင်ပါတယ်။
ကျွန်တော်တို့ လက်ရှိ code က h1 နဲ့ h2 ကို center ပို့ဖို့ အတွက် code ကို အောက်ကလို ပြောင်းလိုက်ပါတယ်။
h1 {
    font-size: 40px;
    color: green;
    font-family: "Times New Roman",serif;
    text-align: center;
}

h2 {
    font-size: 25px;
    color: #336699;
    font-family: "Verdana",arial;
    text-align: center;
}
အထက်ပါ code မှာ text-align: center; ဆိုတာ လက်ရှိ text alignement ကို center ပြောင်းလိုက်တာပါ။ အဲဒီ code ကို အောက်ကလို မြင်ရပါလိမ့်မယ်။
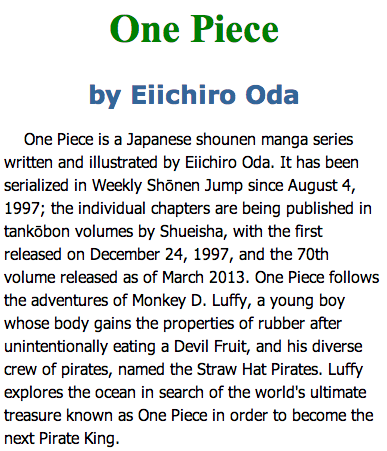
Figure 4-6
တကယ်လို့ right alignment ကို အသုံးပြုချင်ရင်တော့ text-align: right; ဆိုပြီး ခေါ် အသုံးပြုနိုင်ပါတယ်။
Change the Text Case
Text Case ပြောင်းတယ်ဆိုတာကတော့ လက်ရှိ text တွေကို css ကနေ အလိုအလျောက် capitalize, uppercase, lowercase စသည်ဖြင့် ပြောင်းလဲတာပါ။ text-transform property ကို အသုံးပြုနိုင်ပြီး value တွေကတော့ capitalize, uppercase, lowercase , none တို့ကို အသုံးပြုနိုင်ပါတယ်။ လက်ရှိ code က h2 ကို အောက်ကလို ပြောင်းရေးပါမယ်။
h2 {
    font-size: 25px;
    color: #336699;
    font-family: "Verdana",arial;
    text-align: center;
    text-transform: uppercase;
}
အထက်ပါ code မှာ text-transform: uppercase; ဆိုတာကတော့ လက်ရှိ text ကို စာလုံး အကြီးနဲ့ ဖော်ပြမယ်လို့ ဆိုထားတာပါ။ အဲဒီ code လေးက အောက်ကလို မြင်ရပါလိမ့်မယ်။

Figure 4-7
Control Line Spacing
စာတစ်ကြောင်းနဲ့ တစ်ကြောင်း အကွာအဝေးကို ညှိချင်တဲ့ အခါမှာတော့ line-height ကို အသုံးပြုရပါတယ်။ လက်ရှိ HTML က p tag နဲ့ ရေးထားတဲ့ စာတွေကို line spacing ပြောင်းကြည့်ရအောင်။
p {
    text-indent: 20px;
    line-height: 40px;
}
အထက်ပါ code မှာ line-height ကို 40px ပြောင်းလိုက်ပါတယ်။ ဒါကြောင့် စာကြောင်းတွေက ကျဲသွားတာကို တွေ့ရပါလိမ့်မယ်။
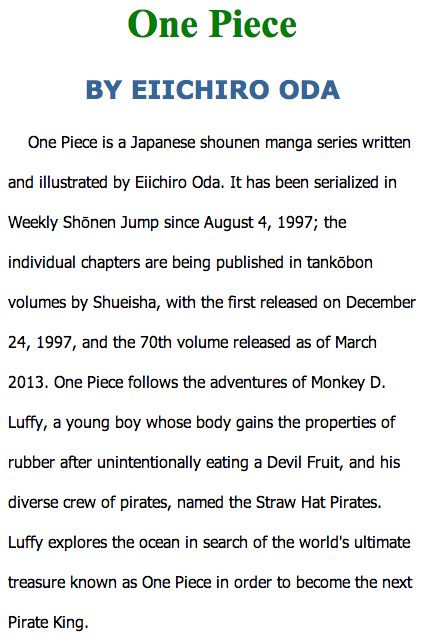
Figure 4-8
Control Letter Spacing
Letter Spacing ကတော့ letter တစ်ခု နဲ့ တစ်ခုကြား အကွာအဝေးကို ပြောင်းတာပါ။ h1 ရဲ့ letter spacing ကို ပြောင်းကြည့်ရအောင်။
h1 {
    font-size: 40px;
    color: green;
    font-family: "Times New Roman",serif;
    text-align: center;
    letter-spacing: 10px;
}
letter-spacing ကို 10px ပေးထားတာ တွေ့ရပါလိမ့်မယ်။ အဲဒီ code လေးကို run ကြည့်လိုက်ရင် အောက်ကလို မြင်ရပါလိမ့်မယ်။
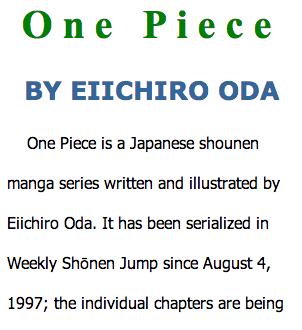
Figure 4-9
Add Background Colors
ကျွန်တော်တို့ အခု page ကို background color ထည့်ပြီးတော့ စာ အချို့ကို highlight လုပ်တဲ့ ပုံစံလေး ဖန်တီးကြည့်ရအောင်။ လက်ရှိ HTML code ကို အောက်ကလို ပြောင်းလိုက်ပါတယ်။
<html>
<head>
    <title>Styling Text</title>
    <link rel="stylesheet" type="text/css" href="style.css">
</head>
<body>
    <h1>One Piece</h1>
    <h2>by Eiichiro Oda</h2>
    <p>One Piece is a Japanese <span class='highlight'>shounen manga series</span> written and illustrated by Eiichiro Oda. It has been serialized in Weekly Shōnen Jump since August 4, 1997; the individual chapters are being published in tankōbon volumes by Shueisha, with the first released on December 24, 1997, and the 70th volume released as of March 2013. One Piece follows the adventures of <span class='highlight'>Monkey D. Luffy</span>, a young boy whose body gains the properties of rubber after unintentionally eating a Devil Fruit, and his diverse crew of pirates, named the Straw Hat Pirates. Luffy explores the ocean in search of the world's ultimate treasure known as One Piece in order to become the next Pirate King.</p>
</body>
</html>
အထက်ပါ code မှာ span နဲ့ highlight class ကို ထည့်ထားတာကို တွေ့နိုင်ပါတယ်။ အခု CSS ထပ်ပြောင်းကြည့်ရအောင်။
body {
    font-family: "Zawgyi-One",arial;
    background-color: #ECF0F1;
}
.highlight {
    background-color: #F1C40F;
}
လက်ရှိ CSS မှာ body ကို background color ထည့်ပြီးတော့ highlight class တစ်ခု ဖန်တီးပါတယ်။ ပြီးတော့ background color ထည့်ထားတာကို တွေ့နိုင်ပါတယ်။ အဲဒါကို လက်တွေ့ စမ်းကြည့်ရင် အောက်ကလို မြင်ရပါမယ်။
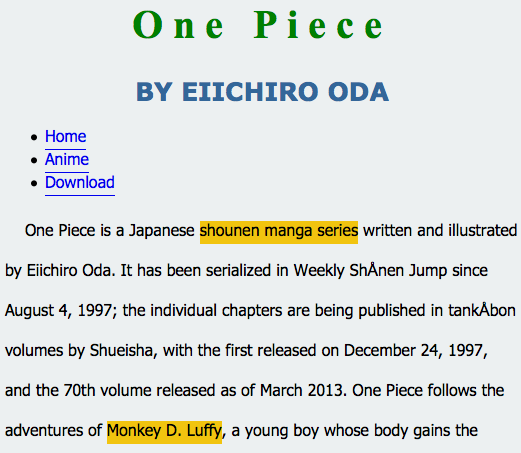
Figure 4-10
Style a Bulleted List
List ကို CSS အသုံးပြုပြီးတော့ ကျွန်တော်တို့တွေ menu လေး တစ်ခု ဖန်တီးကြည့်ရအောင်။ လက်ရှိ html code မှာ list ထပ်ဖြည့်ရအောင်။
<html>
<head>
    <title>Styling Text</title>
    <link rel="stylesheet" type="text/css" href="style.css">
</head>
<body>
    <h1>One Piece</h1>
    <h2>by Eiichiro Oda</h2>
    <ul class="menu">
        <li><a href="./home.html">Home</a></li>
        <li><a href="./anime.html">Anime</a></li>
        <li><a href="./download.html">Download</a></li>
    </ul>
    <p>One Piece is a Japanese <span class='highlight'>shounen manga series</span> written and illustrated by Eiichiro Oda. It has been serialized in Weekly Shōnen Jump since August 4, 1997; the individual chapters are being published in tankōbon volumes by Shueisha, with the first released on December 24, 1997, and the 70th volume released as of March 2013. One Piece follows the adventures of <span class='highlight'>Monkey D. Luffy</span>, a young boy whose body gains the properties of rubber after unintentionally eating a Devil Fruit, and his diverse crew of pirates, named the Straw Hat Pirates. Luffy explores the ocean in search of the world's ultimate treasure known as One Piece in order to become the next Pirate King.</p>
</body>
</html>
အဲဒီ code မှာ ကျွန်တော်တို့ ul ကို အသုံးပြုပြီးတော့ list တစ်ခု ဖန်တီးထားပါတယ်။ class name ကိုတော့ menu ပေးထားတယ်။ အဲဒီ code လေးကို browser မှာ ကြည့်လိုက်ရင် အောက်ကလို မြင်ရပါမယ်။

Figure 4-10
အခု menu css ကို အောက်လို ထည့်လိုက်ရင်အောင်
.menu {
    list-style: none;
    padding: 0px;
    text-align: center;
}

.menu li {
    display: inline;
    padding: 5px;
}

.menu li a{
    text-decoration: none;
    color:#E74C3C;
    border-bottom: 1px dotted #E74C3C;
}
ul တစ်ခုလုံးကို list-style ကို none ထားပြီးတော့ ကိုလည်း အသုံးမပြုပါဘူး။ text-align ကို center ထားလိုက်ပါတယ်။ .menu အောက်မှာ li ရှိပါတယ်။ သူ့အောက်မှာ ရှိတဲ့ li တွေကို ခေါ်ချင်တဲ့ အတွက်ကြောင့် .menu li ဆိုပြီး အသုံးပြုထားပါတယ်။ list တွေအားလုံးကို တစ်လိုင်းထဲမှာ ပြစေချင်တဲ့ အတွက်ကြောင့် display: inline; ကို အသုံးပြုထားပါတယ်။ li တွေ တစ်ခုနဲ့ တစ်ခု မကပ်ထားစေချင်တဲ့ အတွက်ကြောင့် padding: 5px; ဆိုပြီး padding ကို သုံးပြီး ခွာထားပါတယ်။ ပြီးတဲ့ အခါမှာ anchor tag (a) ကို ပြင်ဖို့အတွက် .menu li a ကို အသုံးပြုပါတယ်။ anchor မှာ လိုင်းတားထားတာကို ဖျက်လိုက်တယ်။ နောက်ပြီးတော့ အရောင်ပြောင်းတယ်။ border-bottom ထပ်ဖြည့်ထားပါတယ်။ anchor tag အကြောင်း အသေးစိတ်ကို နောက်ပိုင်းမှာ ရှင်းပြပါမယ်။
အထက်ပါ code ကို browser မှာ ကြည့်လိုက်ရင် အောက်ကလို မြင်ရပါမယ်။
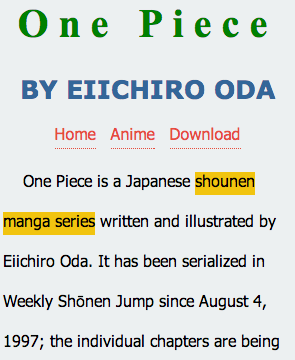
Figure 4-11
အခု chapter 4 မှာ CSS နဲ့ ပတ်သက်ပြီး အတော်အသင့် သိလောက်ပါပြီ။ Text တွေကို အရောင်တွေ စာလုံးတွေ ပြောင်းတတ်လောက်ပါပြီ။ နောက် chapter တစ်ခုမှာ image ဘယ်လို ထည့်ရမလဲ ဆိုတာကို ဆက်လက်ပြီး ရှင်းပြသွားပါမယ်။