Adding Images
သင့်ရဲ့ website မှာ image , ဓာတ်ပုံတွေ တွေ ထည့်ဖို့ရန်အတွက် <img> tag ကို အသုံးပြုပြီး ထည့်သွင်းနိုင်ပါတယ်။ image ကို padding , alignment တွေအတွက် CSS style sheets နဲ့ တွဲပြီး အသုံးပြုနိုင်ပါတယ်။
Web Page Images
Website မှာ image ကို နည်းလမ်း အမျိုးမျိုး နဲ့ အသုံးပြုနိုင်ပါတယ်။ အခုအချိန်မှာ အသုံးပြုကြတဲ့ format ကတော့ JPG, PNG, GIF အပြင် WebP, AVIF, SVG စတာတွေပါ ပါလာပါတယ်။ Image တွေကို အသုံးပြုရမှာ file size ကို သတိထားရပါတယ်။ အရွယ်အစားကြီးမားတဲ့ image တွေဟာ web page ကို ဖော်ပြပြရန် ပုံတွေကို download ချရမှာ နှေးကွေးပါတယ်။
JPG
JPEG, ရဲ့ အရှည်ကတော့ Joint Photographic Experts Group ဖြစ်ပြီး 24 bit color (millions colors) ကို support လုပ်ပါတယ်။ JPEG ကို ကာလာတွေ အများကြီးပါတဲ့ ဓာတ်ပုံတွေ ရုပ်ပုံတွေ မှာ အသုံးပြုကြပါတယ်။ JPEG ဟာ background transparent ပုံတွေ ကို အဖြူရောင် နောက်ခံ အဖြစ်မြင်တွေ့ရပါလိမ့်မယ်။ JPEG ရဲ့ file extension ကတော့ .jpg ဖြစ်ပါတယ်။
GIF
GIF ရဲ့ နာမည်အပြည့်အစုံကတော့ Graphics Interchange Format ပါ။ အရောင်ပေါင်း ၂၅၆ ခုသာ support လုပ်ပါတယ်။ GIF ကို အများအားဖြင့် ရိုးရှင်းလှတဲ့ image တွေမှာ အသုံးပြုကြပါတယ်။ ဒါ့အပြင် logo နဲ့ လိုင်းတွေ တစ်ရောင်တည်းရှိတဲ့ ပုံတွေမှာ အသုံးပြုကြပါတယ်။ တကယ်လို့ image ဟာ အရောင်နည်းနည်းပဲ ပါဝင်ပြီး အသေးစိတ် မလိုအပ်ဘူးဆိုရင် GIF format ကို ရွေးချယ်သင့်ပါတယ်။ GIF ဟာ background transparent ပုံတွေကို သိမ်းနိုင်ပါတယ်။ GIF ဟာ images တွေ အများကြီး သိမ်းထားနိုင်ပြီးတော့ လှုပ်ရှားမှုပုံတွေကို ပြသနိုင်ပါတယ်။ GIF image ကို .gif file extension နဲ့ သိမ်းပါတယ်။
PNG
PNG (Portable Network Graphics) format ဟာ အရောင် မြောက်များစွာကို support လုပ်ပါတယ်။ ဒါ့အပြင် file အရွယ်အစားကိုပါ ချုံ့ပေးထားပါတယ်။ PNG ကို ပုံ အမျိုးမျိုးအတွက် ရွေးချယ် နိုင်ပါတယ်။ JPEG လိုပါပဲ PNG ဟာ 24 bit color ကို support လုပ်ပါတယ်။ ဒါ့အပြင် အရောင်အနည်းငယ်သာ ပါဝင်တဲ့ ပုံတွေ ကိုလည်း GIF ကဲ့သို့ save လုပ်နိုင်ပါတယ်။ GIF လိုပဲ background transparent ပုံတွေကို သိမ်းဆည်းနိုင်ပါတယ်။ PNG ဟာ GIF, JPEG တို့လို browser အားလုံးနီးပါးမှာ support လုပ်ပါတယ်။ PNG ကို .png file extension နဲ့သိမ်းပါတယ်။
WebP and AVIF
WebP နဲ့ AVIF တို့ဟာ modern browser တွေမှာ အသုံးများလာတဲ့ image format တွေပါ။ ပုံအရည်အသွေးကောင်းကောင်းကို file size သေးသေးနဲ့ ထိန်းနိုင်တာကြောင့် website loading speed အတွက် အကျိုးရှိပါတယ်။ Browser support မသေချာတဲ့ audience အတွက်တော့ <picture> tag နဲ့ fallback image ထည့်ထားနိုင်ပါတယ်။
Downloading Considerations
Browser ဟာ web page မှာ ပုံတွေ ပြသဖို့ရန်အတွက် ပုံတွကို ဦးစွာ download ဆွဲချရပါတယ်။ တကယ်လို့ image size ဟာ ကြီးနေရင်တော့ ချက်ခြင်း မပြသနိုင်ပဲ အချိန် အနည်းငယ်ကြာမြင့်ပါလိမ့်မယ်။ Internet connection ရဲ့ speed ပေါ်မှာ မူတည်ပြီး download ချတဲ့ အချိန်ကြာမြင့်တတ်ပါတယ်။ ပုံအကြီးကြီးတွေကို မိမိ computer ထဲမှာ ကြည့်လျှင် မြန်ဆန်ပေမယ့် internet ပေါ်ရောက်သွားပြီး web server ပေါ်ကနေ download ချတဲ့ အခါ ကြာမြင့်ပါလိမ့်မယ်။ ဒါကြောင့် website တည်ဆောက်ရာမှာ ပုံတွေကို တတ်နိုင်သလောက် file အရွယ်အစား သေးအောင်ဖန်တီးထားသင့်ပါတယ်။ ပုံအကြီးကြီးတွေ အများကြီးပါခဲ့ရင်တော့ download လုပ်နေတာကြောင့် သင့် website ဟာ browser ပေါ်မှာ အပြည့်အစုံ ဖော်ပြဖို့အတွက် အချိန်အကြာကြီး စောင့်ဆိုင်းနေရပါလိမ့်မယ်။
Optimize Images
Image editing programs (Photoshop, Pixelmator, GIMP) စတာတွေမှာ image quality ကို ချိန်ညှိတာပါပါတယ်။ image quality ပေါ်မှာ မူတည်ပြီးတော့ image size တွေ ပြောင်းလဲနိုင်ပါတယ်။ တကယ်လို့ ပုံအကြီးကြီးတွေ သုံးရမယ်။ image size က 100 KB ထက်ကျော်နေရင်တော့ connection နှေးတဲ့ နေရာတွေမှာ ပုံတွေကို download ချရမှာ နှေးနေပါမယ်။ GIF သို့မဟုတ် PNG ကို အသုံးပြုရရင် colors အရေအတွက်ကို လျော့ချခြင်းဖြင့် ဖိုင်အရွယ်အစားကို သေးလိုက်နိုင်ပါတယ်။ Photoshop လိုမျိုး editor တွေမှာ save for web လိုမျိုး feature တွေပါပါတယ်။ ဒါမှမဟုတ် Windows မှာပါတဲ့ Paint, macOS မှာပါတဲ့ Preview တို့ကလည်း image size ပြောင်းတဲ့ နေရာမှာ အသုံးပြုနိုင်ပါတယ်။
Alternative Text
အသုံးပြုသူတွေဟာ စာဖတ်ရတာ မြန်အောင် ပုံတွေကို မမြင်ရတဲ့ download ချတဲ့ setting ကို browser မှာ ထားလို့ရပါတယ်။ အဲဒီအခါမှာ ပုံတွေ ကို အသုံးပြုသူမမြင်ရပေမယ့် ပုံနဲ့ သက်ဆိုင်တဲ့ စာကို ပုံအစား ဖော်ပြလို့ရပါတယ်။ အဲဒီ အတွက် alternative text ကို အသုံးပြုပါတယ်။ Alternative text ဆိုတာဟာ user ကို ဒါ ဘာပုံလဲဆိုတာကို နားလည်စေရန် ရည်ရွယ်ပါတယ်။ Alternative ထည့်သွင်းပုံကို ဒီ အခန်းမှာ ဖော်ပြပေးမှာပါ။
Insert an Image
အခု ကျွန်တော်တို့တွေ ပုံလေးကို ထည့်ရအောင်။ ပြီးခဲ့တဲ့ code မှာ onepiece_cover.jpg ဆိုတာလေးကို ထည့်ပါမယ်။ အောက်မှာ code လေးကို ကြည့်လိုက်ပါ။
<html>
<head>
    <title>Styling Text</title>
    <link rel="stylesheet" type="text/css" href="style.css">
</head>
<body>
    <h1>One Piece</h1>
    <h2>by Eiichiro Oda</h2>
    <ul class="menu">
        <li><a href="./home.html">Home</a></li>
        <li><a href="./anime.html">Anime</a></li>
        <li><a href="./download.html">Download</a></li>
    </ul>
        <img src="onepiece_cover.jpg">
    <p>One Piece is a Japanese <span class='highlight'>shounen manga series</span> written and illustrated by Eiichiro Oda. It has been serialized in Weekly Shōnen Jump since August 4, 1997; the individual chapters are being published in tankōbon volumes by Shueisha, with the first released on December 24, 1997, and the 70th volume released as of March 2013. One Piece follows the adventures of <span class='highlight'>Monkey D. Luffy</span>, a young boy whose body gains the properties of rubber after unintentionally eating a Devil Fruit, and his diverse crew of pirates, named the Straw Hat Pirates. Luffy explores the ocean in search of the world's ultimate treasure known as One Piece in order to become the next Pirate King.</p>
</body>
</html>
အထက်ပါ code မှာ <img src="onepiece_cover.jpg"> ဆိုတာလေးကို တွေ့ပါလိမ့်မယ်။ အဲဒီ code လေးက image ထည့်သွင်းမယ်လို့ ဆိုထားတာပါ။ image path ကို src မှာ ရေးရပါတယ်။ လက်ရှိ index.html နဲ့ ပုံနဲ့ သိမ်းထားတဲ့ နေရာ အတူတူမှာ ရှိတဲ့ အတွက်ကြောင့် src မှာ ပုံရဲ့ file name တစ်ခါတည်းရေးလို့ရပါတယ်။
လက်ရှိ file တွေက အောက်ဖော်ပြပါ ပုံအတိုင်း ရှိပါတယ်။
Figure 5-1. File Structure
အထက်ပါ code ကို browser မှာကြည့်ရင် အောက်ကလို မြင်ရပါလိမ့်မယ်။
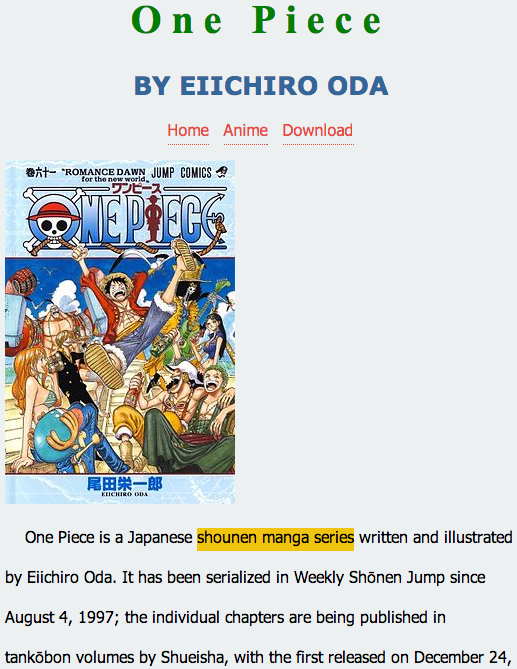
Figure 5-2
လက်ရှိ code ကိုပဲ အောက်မှာ နောက်ထပ် ပုံ တစ်ပုံ ထည့်ပါမယ်။
<html>
<head>
    <title>Styling Text</title>
    <link rel="stylesheet" type="text/css" href="style.css">
</head>
<body>
    <h1>One Piece</h1>
    <h2>by Eiichiro Oda</h2>
    <ul class="menu">
        <li><a href="./home.html">Home</a></li>
        <li><a href="./anime.html">Anime</a></li>
        <li><a href="./download.html">Download</a></li>
    </ul>
        <img src="onepiece_cover.jpg">
    <p>One Piece is a Japanese <span class='highlight'>shounen manga series</span> written and illustrated by Eiichiro Oda. It has been serialized in Weekly Shōnen Jump since August 4, 1997; the individual chapters are being published in tankōbon volumes by Shueisha, with the first released on December 24, 1997, and the 70th volume released as of March 2013. One Piece follows the adventures of <span class='highlight'>Monkey D. Luffy</span>, a young boy whose body gains the properties of rubber after unintentionally eating a Devil Fruit, and his diverse crew of pirates, named the Straw Hat Pirates. Luffy explores the ocean in search of the world's ultimate treasure known as One Piece in order to become the next Pirate King.</p>
    <img src="images/luffy.png">
</body>
</html>
အထက်ပါ code မှာ <img src="images/luffy.png"> ဆိုပြီး ထည့်ထားတာကို တွေ့ရပါမယ်။ images ဆိုတဲ့ folder အောက်က luffy.png ကို သုံးမယ်လို့ ဆိုထားတာပါ။
လက်ရှိ file တွေက အောက်ဖော်ပြပါ ပုံအတိုင်း ရှိပါတယ်။
Figure 5-3. File Structure
အထက်ပါ code ကို browser မှာကြည့်ရင် အောက်ကလို မြင်ရပါလိမ့်မယ်။
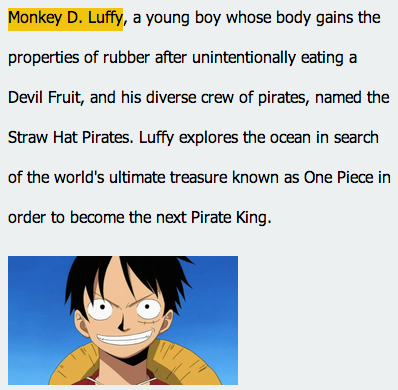
Figure 5-4
Image Size
ပုံတွေ ရဲ့ အရွယ်အစားပြောင်းချင်ရင်တော့ width နဲ့ height attribute ကို အသုံးပြုနိုင်ပါတယ်။
<img src="onepiece_cover.jpg" width="150">
အထက်ပါ code မှာ width ကို 150px ပေးထားပါတယ်။ height က width ရဲ့ size ပေါ်မှာ မူတည်ပြီး ratio အတိုင်း အလိုလို ပြောင်းပေးပါတယ်။ တကယ်လို့ height ကိုလည်း ပုံသေ value ပေးချင်တယ်ဆိုရင်တော့ height attribute မှာ value ထည့်ပေးဖို့လိုပါတယ်။
<img src="onepiece_cover.jpg" width="160" height="160">
အထက်ပါ code မှာ ဆိုရင် image ရဲ့ width ကော height ကော က 160px ဖြစ်သွားပါလိမ့်မယ်။ pixel အပြင် value ကို percentage နဲ့လည်း ပေးလို့ရပါတယ်။
<img src="onepiece_cover.jpg" width="80%">
လက်ရှိ ပုံ အရွယ်အစားရဲ့ 80% ထိသာ ပြတော့မှာပါ။ တကယ်လို့ ပုံ အရွယ်အစားက 100px ဖြစ်ရင် ပြတဲ့ အခါ ပုံအရွယ်အစားကို 80px အနေဖြင့်သာ ပြပါလိမ့်မယ်။ အခု ကျွန်တော်တို့ရဲ့ code ကို အောက်ကလို ပြင်လိုက်ပါမယ်။
<html>
<head>
    <title>Styling Text</title>
    <link rel="stylesheet" type="text/css" href="style.css">
</head>
<body>
    <h1>One Piece</h1>
    <h2>by Eiichiro Oda</h2>
    <ul class="menu">
        <li><a href="./home.html">Home</a></li>
        <li><a href="./anime.html">Anime</a></li>
        <li><a href="./download.html">Download</a></li>
    </ul>
        <img src="onepiece_cover.jpg" width="150">
    <p>One Piece is a Japanese <span class='highlight'>shounen manga series</span> written and illustrated by Eiichiro Oda. It has been serialized in Weekly Shōnen Jump since August 4, 1997; the individual chapters are being published in tankōbon volumes by Shueisha, with the first released on December 24, 1997, and the 70th volume released as of March 2013. One Piece follows the adventures of <span class='highlight'>Monkey D. Luffy</span>, a young boy whose body gains the properties of rubber after unintentionally eating a Devil Fruit, and his diverse crew of pirates, named the Straw Hat Pirates. Luffy explores the ocean in search of the world's ultimate treasure known as One Piece in order to become the next Pirate King.</p>
    <img src="images/luffy.png">
</body>
</html>
onepiece_cover.jpg ကို width 150px နဲ့ ပြပါလို့ရေးထားပါတယ်။ ဒါကြောင့် browser မှာ ကြည့်လိုက်ရင် ပုံ size သေးသွားတာကို တွေ့ပါလိမ့်မယ်။
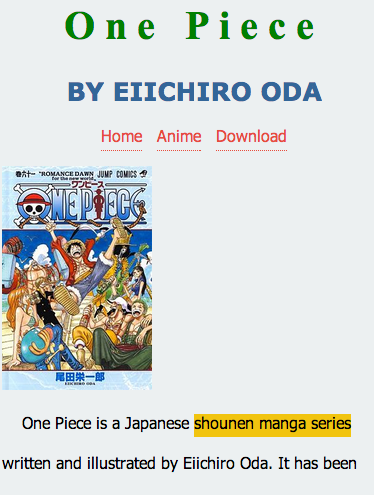
Figure 5-5
Alternative Text
Alternative text ကို ပုံကို download ချဖို့ ပိတ်ထားတဲ့ အခါ ၊ ဒါမှမဟုတ် ပုံရှာမတွေ့တဲ့ အခါမှာ ဖော်ပြဖို့အတွက် အသုံးပြုပါတယ်။
<html>
<head>
    <title>Styling Text</title>
    <link rel="stylesheet" type="text/css" href="style.css">
</head>
<body>
    <h1>One Piece</h1>
    <h2>by Eiichiro Oda</h2>
    <ul class="menu">
        <li><a href="./home.html">Home</a></li>
        <li><a href="./anime.html">Anime</a></li>
        <li><a href="./download.html">Download</a></li>
    </ul>
        <img src="aonepiece_cover.jpg" width="150" height="200" alt="One Piece cover">
    <p>One Piece is a Japanese <span class='highlight'>shounen manga series</span> written and illustrated by Eiichiro Oda. It has been serialized in Weekly Shōnen Jump since August 4, 1997; the individual chapters are being published in tankōbon volumes by Shueisha, with the first released on December 24, 1997, and the 70th volume released as of March 2013. One Piece follows the adventures of <span class='highlight'>Monkey D. Luffy</span>, a young boy whose body gains the properties of rubber after unintentionally eating a Devil Fruit, and his diverse crew of pirates, named the Straw Hat Pirates. Luffy explores the ocean in search of the world's ultimate treasure known as One Piece in order to become the next Pirate King.</p>
    <img src="images/luffy.png" alt="luffy">
</body>
</html>
အထက်ပါ code မှာ cover image ကို ပုံနာမည် အမှားထည့်ထားပါတယ်။ luffy.png မှာလည်း alt="luffy" ဆိုပြီး ထည့်ထားတာ ရှိပါတယ်။ ပုံ ရဲ့ လမ်းကြောင်း အမှားထည့်ထားတာ ကြောင့် browser မှာ ပုံ မမြင်ရပါဘူး။ ထည့်ထားတဲ့ alternative text ကို သာမြင်ရပါလိမ့်မယ်။
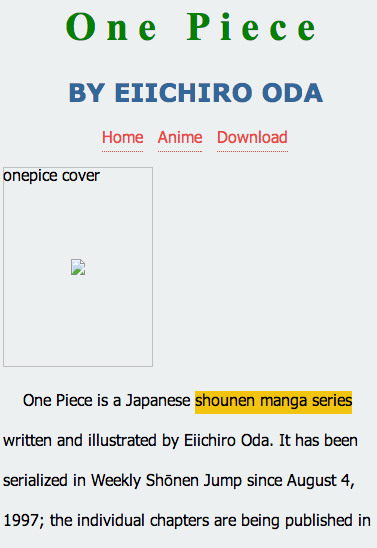
Figure 5-6
Image Label
အခု image ကို မှန်တဲ့ URL ထည့်ပြီးတော့ title attribute ကို အောက်ကလိုထည့်ပါမယ်။
<img src="onepiece_cover.jpg" title="One Piece Cover" width="150" height="200" alt="One Piece cover">
title="One Piece Cover" ဆိုတာကတော့ ဒီ image ရဲ့ ခေါင်းစဉ်ပါ။ mouse pointer ထောက်လိုက်ရင် tooltip အနေနဲ့ ပေါ်လာမယ့် စာပါ။
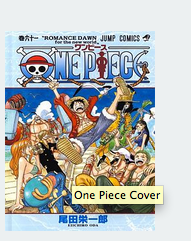
Figure 5-7
ပုံတွေမှာ mouse ထောက်လိုက်ပြီးတော့ ဘာ ပုံလည်းဆိုတာကို ညွှန်းတဲ့ အနေနဲ့ အသုံးပြုပါတယ်။ title ဟာ search engine လိုမျိုးတွေမှာ ပုံကို ရှာတွေ့ဖို့လည်း အထောက် အကူပြုပါတယ်။ ဒါကြောင့် ပုံတွေကို ထည့်သွင်းရာမှာ alternative text နဲ့ title နှစ်ခုလုံးကို အသုံးပြုသင့်ပါတယ်။
Add an Image as a Figure
<figure> ကို အဓိက စာတွေနဲ့ အတူ ပုံတွေကို ခေါင်းစီးနဲ့ တွဲပြီး ပြဖို့အတွက် အသုံပြုနိုင်ပါတယ်။ ဥပမာ ။။ ကျောင်းစာတွေထဲမှာ ပုံကို ရည်ညွှန်းပြီးတော့ ပုံတွေ ဇယားတွေ စတာတွေပါလာတတ်ပါတယ်။ အဲဒီအခါမှာ ကျွန်တော်တို့တွေ အနေနဲ့ <figcaption> ကို <figure> အထဲမှာ ထည့်ပြီး ညွှန်းထားတဲ့ ခေါင်းစဉ် အနေနဲ့ ဖော်ပြလို့ရပါတယ်။
index.html မှာ figure ထပ်ဖြည့်လိုက်ပါတယ်။
<html>
<head>
    <title>Styling Text</title>
    <link rel="stylesheet" type="text/css" href="style.css">
</head>
<body>
    <h1>One Piece</h1>
    <h2>by Eiichiro Oda</h2>
    <ul class="menu">
        <li><a href="./home.html">Home</a></li>
        <li><a href="./anime.html">Anime</a></li>
        <li><a href="./download.html">Download</a></li>
    </ul>
        <img src="onepiece_cover.jpg" title="One Piece Cover" width="150" height="200" alt="One Piece cover">
    <p>One Piece is a Japanese <span class='highlight'>shounen manga series</span> written and illustrated by Eiichiro Oda. It has been serialized in Weekly Shōnen Jump since August 4, 1997; the individual chapters are being published in tankōbon volumes by Shueisha, with the first released on December 24, 1997, and the 70th volume released as of March 2013. One Piece follows the adventures of <span class='highlight'>Monkey D. Luffy</span>, a young boy whose body gains the properties of rubber after unintentionally eating a Devil Fruit, and his diverse crew of pirates, named the Straw Hat Pirates. Luffy explores the ocean in search of the world's ultimate treasure known as One Piece in order to become the next Pirate King.</p>
            <figure>
       <img src="images/luffy.png" alt="Luffy" title="Luffy">
            <figcaption>Luffy</figcaption>
            </figure>
</body>
</html>
ပြီးတော့ style.css မှာ figure နဲ့ figurecaption ကို ထပ်ဖြည့်ပါတယ်။
body {
    font-family: "Zawgyi-One",arial;
    background-color: #ECF0F1;
}
.highlight {
    background-color: #F1C40F;
}
h1 {
    font-size: 40px;
    color: green;
    font-family: "Times New Roman",serif;
    text-align: center;
    letter-spacing: 10px;
}

h2 {
    font-size: 25px;
    color: #336699;
    font-family: "Verdana",arial;
    text-align: center;
    text-transform: uppercase;

}

p {
    text-indent: 20px;
    line-height: 40px;
}

.menu {
    list-style: none;
    padding: 0px;
    text-align: center;
}

.menu li {
    display: inline;
    padding: 5px;
}

.menu li a{
    text-decoration: none;
    color:#E74C3C;
    border-bottom: 1px dotted #E74C3C;
}


figure {
    padding:10px;
    padding-bottom: 0px;
    width: 230px;
    background-color:#16A085;
}

figcaption {
    padding-top:8px;
    font-weight: bold;
    text-align: center;
    color:#FFF;
}
အဲဒီ code ကို browser မှာဆိုရင် အောက်ပုံလိုမြင်ရပါမယ်။
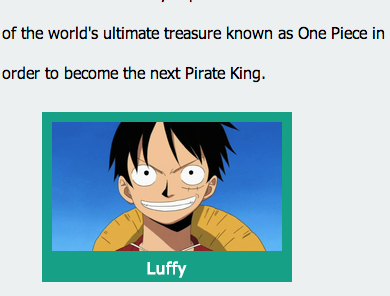
Figure 5-8
figure ရဲ့ width ကို 230px ပေးထားပါတယ်။ background ကို အစိမ်းရင့်ရောင် သုံးထားပါတယ်။ figure ရဲ့ caption ကိုတော့ အဖြူရောင် သုံးပြီး bold လုပ်ထားပါတယ်။ figure နဲ့ figurecaption ဟာ css နဲ့ တွဲပြီး သုံးမှသာ အဆင်ပြေပါတယ်။
Align an Image Horizontally
CSS မှာ float ဆိုတဲ့ proptery က image ကို စာရဲ့ horizontal positioning ချိန်ညှိရာမှာ အသုံးပြုနိုင်ပါတယ်။ float အတွက် left ဆိုရင် စာတွေဟာ ပုံရဲ့ ညာဘက်မှာ ပေါ်မှာ ဖြစ်ပြီး flat right ဆိုရင်တော့ စာတွေဟာ ဘယ်ဘက် ရောက်သွားမယ်။ အောက်မှာ style.css ကို ပြင်ထားတာလေး ကြည့်လိုက်ပါ။
style.css မှာ cover class ကို ထပ်ဖြည့်လိုက်တယ်။
.cover {
    float: right;
    padding-left: 10px;
}
index.html က cover ပုံမှာ css class ဖြည့်လိုက်ပါတယ်။
<img class='cover' src="onepiece_cover.jpg" title="One Piece Cover" width="150" height="200" alt="One Piece cover">
အဲဒီ အခါမှာ အောက်ကလို မြင်ရပါတယ်။

Figure 5-9
ပုံဟာ ညာဘက် အခြမ်းကပ်သွားပြီး စာသားနဲ့ padding 10px ခွာထားပါတယ်။
Align an Image Vertically
ပုံနှင့်စာ တွဲပြီးတော့ ပြချိန်မှာ စာ ကို ပုံ နဲ့ align ချိန်မယ်ဆိုရင်တော့ vertical-align ကို အသုံးပြုနိုင်ပါတယ်။ middle ၊ top ၊ bottom ဆိုပြီး ရှိပါတယ်။
css မှာ အောက်က code လေး ထပ်ဖြည့်လိုက်ပါ။
.middle {
    vertical-align: middle;
}
html မှာတော့ luffy image ကို ပုံမှန် ရိုးရိုးပဲထားပါမယ်။ middle class ကို အသုံးပြုပါမယ်။
<img src="images/luffy.png" class="middle" alt="Luffy" title="Luffy">luffy
စာက ပုံရဲ့ အလယ်ကို ရောက်နေတာ တွေ့ပါလိမ့်မယ်။ တကယ်လို့ ထိပ်ပိုင်းမှာ ရှိချင်ရင် top ကို အသုံးပြုပြီးတော့ အောက်ပိုင်းရောက်စေချင် bottom ကို အသုံးပြုရပါတယ်။
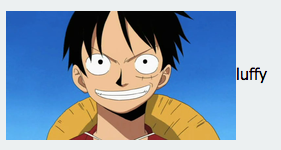
Figure 5-10
Center an Image
အခု image ကို စာ ရဲ့ center မှာ ပေါ်အောင် လုပ်ကြည့်ပါမယ်။
css မှာ text-center ဆိုတဲ့ class ထပ်ဖြည့်ပါမယ်။
.text-center {
    text-align: center;
}
index.html ကိုတော့ အောက်ကလို ပြောင်းလိုက်မယ်။
<html>
<head>
    <title>Styling Text</title>
    <link rel="stylesheet" type="text/css" href="style.css">
</head>
<body>
    <h1>One Piece</h1>
    <h2>by Eiichiro Oda</h2>
    <ul class="menu">
        <li><a href="./home.html">Home</a></li>
        <li><a href="./anime.html">Anime</a></li>
        <li><a href="./download.html">Download</a></li>
    </ul>
        <img class='cover' src="onepiece_cover.jpg" title="One Piece Cover" width="150" height="200" alt="One Piece cover">
    <p>One Piece is a Japanese <span class='highlight'>shounen manga series</span> written and illustrated by Eiichiro Oda. It has been serialized in Weekly Shōnen Jump since August 4, 1997; the individual chapters are being published in tankōbon volumes by Shueisha, with the first released on December 24, 1997, and the 70th volume released as of March 2013. </p>
<div class='text-center'><img src="images/luffy.png" class="middle" alt="Luffy" title="Luffy"></div>
    <p>One Piece follows the adventures of <span class='highlight'>Monkey D. Luffy</span>, a young boy whose body gains the properties of rubber after unintentionally eating a Devil Fruit, and his diverse crew of pirates, named the Straw Hat Pirates. Luffy explores the ocean in search of the world's ultimate treasure known as One Piece in order to become the next Pirate King.</p>
</body>
</html>
အဲဒီ code ထဲမှာ
<div class='text-center'><img src="images/luffy.png" class="middle" alt="Luffy" title="Luffy"></div>
ဆိုတာက div ကို အသုံးပြုပြီးတော့ image ကို text-align:center နဲ့ အလယ်ကို ပို့လိုက်တာပါ။ image ကိုသာမက text တွေကိုလည်း text-align:center ကို သုံးပြီး စာကို အလယ်မှာ ပေါ်အောင် ဖန်တီးနိုင်ပါတယ်။ အဲဒီ code လေးကို အောက်ကလို မြင်ရပါမယ်။
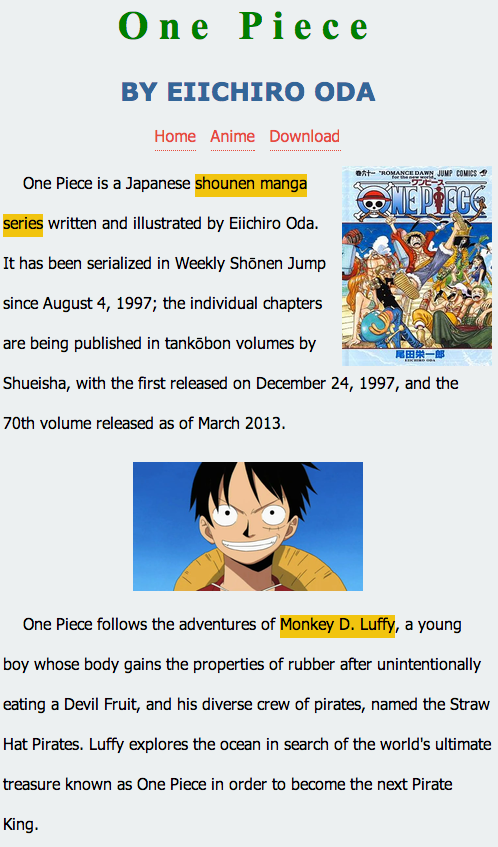
Figure 5-11
Stop Text Wrap
အောက်က ပုံကို ကြည့်လိုက်ပါ။ ပထမ အပိုဒ်ပြီးတော့ ဒုတိယ အပိုဒ်က ပုံနဲ့ ကပ်နေပါတယ်။ ပုံအောက်မှာသာ ပေါ်ချင်တယ်ဆိုရင် ကျွန်တော်တို့တွေ clear ဆိုတာကို အသုံးပြုရပါတယ်။ clear မှာ left ၊ right ၊ both ဆိုပြီး ရှိပါတယ်။ ၂ ခြမ်း လုံး ရှင်းမယ်ဆိုရင်တော့ both ကို အသုံးပြုပါတယ်။

Figure 5-12
style.css မှာ clear ဆိုတဲ့ class ထပ်ဖြည့်ပါတယ်။
.clear {
    clear:both;
}
index.html မှာတော့ clear ကို အသုံးပြုထားတဲ့ div ကို ထည့်လိုက်ပါတယ်။
<html>
<head>
    <title>Styling Text</title>
    <link rel="stylesheet" type="text/css" href="style.css">
</head>
<body>
    <h1>One Piece</h1>
    <h2>by Eiichiro Oda</h2>
    <ul class="menu">
        <li><a href="./home.html">Home</a></li>
        <li><a href="./anime.html">Anime</a></li>
        <li><a href="./download.html">Download</a></li>
    </ul>
        <img class='cover' src="onepiece_cover.jpg" title="One Piece Cover" width="150" height="200" alt="One Piece cover">
    <p>One Piece is a Japanese <span class='highlight'>shounen manga series</span> written and illustrated by Eiichiro Oda. It has been serialized in Weekly Shōnen Jump since August 4, 1997; the individual chapters are being published in tankōbon volumes by Shueisha, with the first released on December 24, 1997, and the 70th volume released as of March 2013. </p>
<div class="clear"></div>
    <p>One Piece follows the adventures of <span class='highlight'>Monkey D. Luffy</span>, a young boy whose body gains the properties of rubber after unintentionally eating a Devil Fruit, and his diverse crew of pirates, named the Straw Hat Pirates. Luffy explores the ocean in search of the world's ultimate treasure known as One Piece in order to become the next Pirate King.</p>
</body>
</html>
အဲဒီ အခါ စာက အောက်ကလို ပုံစံ ဖြစ်သွားပါမယ်။
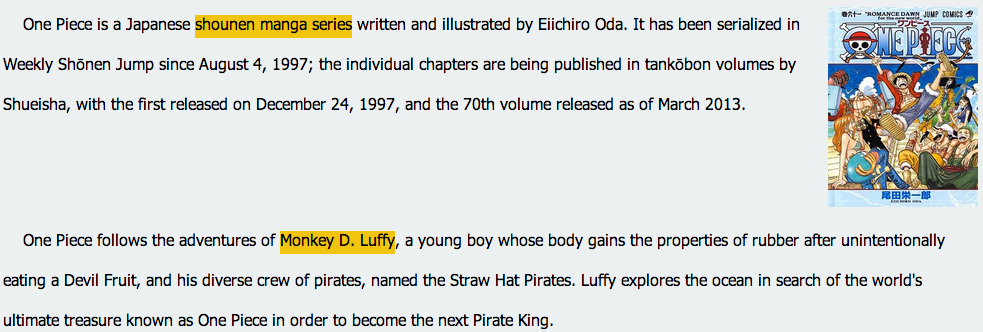
Figure 5-13
Add Space around an Image
ပုံနဲ့ စာနဲ့ မကပ်ပဲ ခွာနေအောင် padding ကို အသုံးပြုနိုင်ပါတယ်။ cover image မှာ padding သုံးခဲ့တာ မှတ်မိပါလိမ့်မယ်။ padding မှာ padding-left ၊ padding-right ၊ padding-top ၊ padding-bottom ဆိုပြီးရှိပါတယ်။
padding တကြောင်းထဲ လည်း ရေးလို့ရပါတယ်။
padding:25px 50px 75px 100px
မှာ top က 25px , right က 50px , bottom က 75px နှင့် left က 100px ပါ။
padding:25px 50px 75px;
မှာ to 25px, right နှင့် left က 50px ။ bottom ကတော့ 75px ပါ။
padding:25px 50px;
မှာ top နဲ့ bottom က 25px, right နှင့် left က 50px ပါ။
padding:25px;
မှာ padding အားလုံးက 25px ပါ
Padding ကို image တွေသာမက text အတွက် div ,span စတာတွေမှာလည်း အသုံးပြုနိုင်ပါတယ်။
Add a Background Image
အခု body ရဲ့ နောက်ခံ ထည့်ဖို့အတွက် tree_bark.png ဆိုတဲ့ image ကို အသုံးပြုပါမယ်။
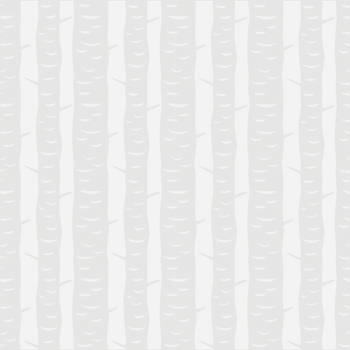
Figure. tree_bark.png
tree_bark.png ကို images folder အောက်မှာ ထားပါမယ်။ ပြီးရင် style.css က body မှာ background-image ထည့်ပါမယ်။
body {
    font-family: "Zawgyi-One",arial;
    background-color: #ECF0F1;
    background-image: url("./images/tree_bark.png");
}
အဲဒီ အခါ အောက်ကလို မြင်ရပါမယ်။
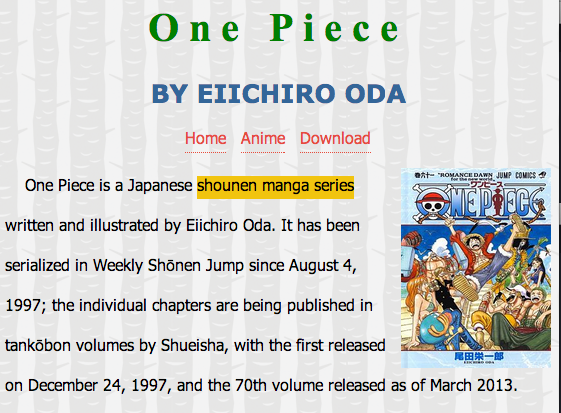
Figure 5-14
Pattrn ဖြစ်တဲ့အတွက် x position ကော y positon ပါ fill လုပ်သွားတာပါ။ တကယ်လို့ x positon တစ်ခုပဲ fill လုပ်စေချင်ရင်
background-repeat: repeat-x;
ဆိုပြီး သုံးနိုင်ပါတယ်။ အဲဒီ အခါ အလျားလိုက် ပဲ fill လုပ်သွားပါမယ်။
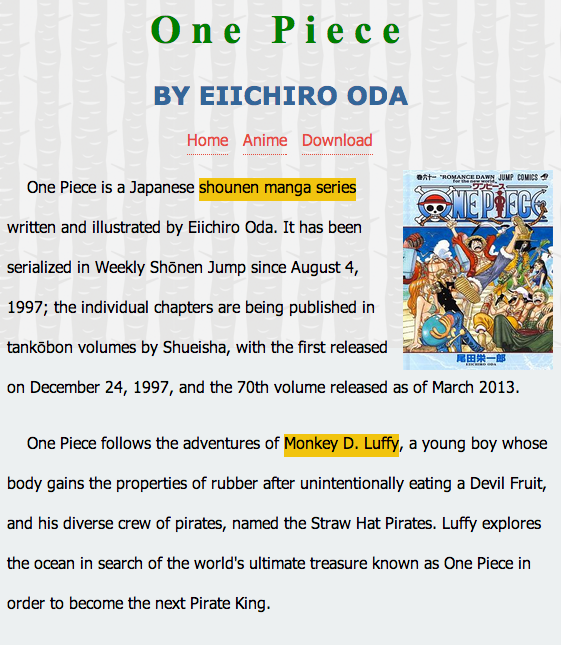
Figure 5-15
ဒေါင်လိုက်ပဲ fill လုပ်ချင်ရင်တော့
background-repeat: repeat-y;
ကို အသုံးပြုနိုင်ပါတယ်။
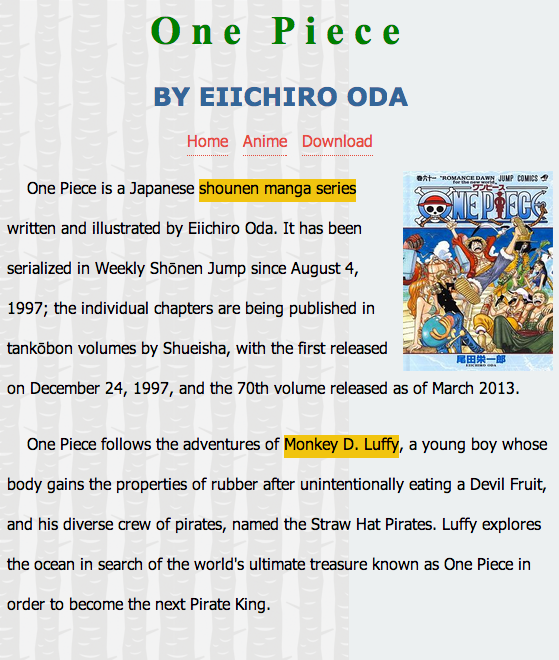
Figure 5-16
default value က repeat ပါ။ တကယ်လို့ ပုံကို repeat မလုပ်ချင်ရင်
background-repeat: no-repeat;
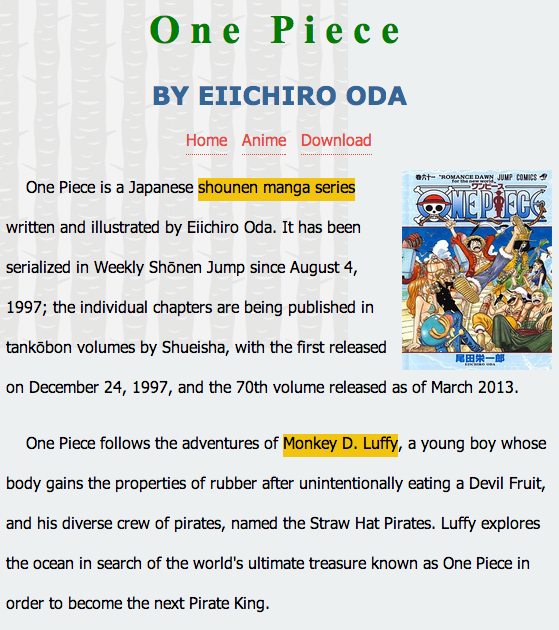
Figure 5-17
Add a Meter Image
ကျွန်တော်တို့ အနေနဲ့ <meter> tag ကို လက်ရှိ range value ကို ဖော်ပြတဲ့ နေရာမှာ အသုံးပြုနိုင်ပါတယ်။
<meter>54 points</meter>
ဆိုရင် လက်ရှိ value မပါရှိတဲ့ အတွက် အောက်ကလို သာ ဖော်ပြပါလိမ့်မယ်။

Figure 5-18
<meter value="38" min="0" max="100">38 points</meter>
value က 38 ဖြစ်ပြီး အနိမ့်ဆုံးက 0 ။ အမြင့်ဆုံးက ၁၀၀ ဖြစ်တယ်လို့ ဆိုထားပါတယ်။

Figure 5-19
အဲဒီ code ကို low , high , optimum attribute တွေ ထည့်သွင်းပါမယ်။ အနိမ့် ၊ အမြင့် နှင့် အမြင့်ဆုံးပေ့ါ။ အနီ ၊ အဝါ နှင့် အစိမ်းရောင်တွေ နဲ့ ဖော်ပြပါလိမ့်မယ်။

Figure 5-20
Loading အနေနဲ့ ပြချင်တာ ။ progress အနေနဲ့ အလုပ်လုပ်စေချင်ရင်တော့ meter အစား progress tag ကို သုံးသင့်ပါတယ်။
$0 <progress value="850" max="1000">$850</progress> $1000
အဲဒီ code က chrome မှာ ဆိုရင် အောက်ကလို မြင်ရပါမယ်။
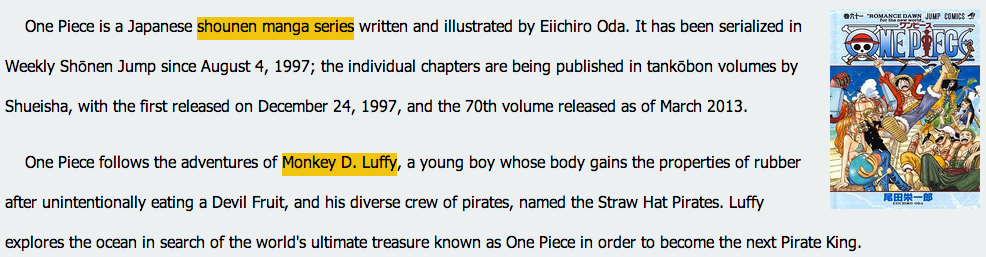
Figure 5-21
meter ကို လက်တွေ့ အသုံးချထားတဲ့ code ကို လေ့လာကြည့်ရ အောင်
<html>
<head>
    <title>Meter</title>
    <style>
    @import url(http://fonts.googleapis.com/css?family=Roboto);

body {

  font-family: "Roboto", "Lucida Grande", "Lucida", sans-serif;
  margin: 5em auto;
  background: radial-gradient(#f9f9f9 20%, #ddd 80%);
  width: 550px;
}

h1 {

  font-size: 1.5em;
  margin: 0 auto 2.5em;
  font-weight: 700;
}

pre {

  font-family: Consolas, Monaco, monospace;
  font-size: 85%;
  color: #666;
  font-weight: 400;
}

meter {

  display: block;
  margin: 0 auto;

  width: 550px;
  height: 25px;

  -webkit-appearance: none;
     -moz-appearance: none;
          appearance: none;

  border: 1px solid #ccc;
  border-radius: 3px;

  /* Firefox */
  background: none; /* Required to get rid of the default background prop. */
  background-color: whiteSmoke;
  box-shadow: 0 5px 5px -5px #333 inset;
}

meter::-webkit-meter-bar {

  background: none; /* Important to get rid of default background. */
  background-color: whiteSmoke;

  box-shadow: 0 5px 5px -5px #333 inset;
}

meter::-webkit-meter-optimum-value {

  transition: width .5s;
  box-shadow: 0 5px 5px -5px #999 inset;

  background-image: linear-gradient( 90deg,
                                     #8bcf69 5%,
                                     #e6d450 5%,
                                     #e6d450 15%,
                                     #f28f68 15%,
                                     #f28f68 55%,
                                     #cf82bf 55%,
                                     #cf82bf 95%,
                                     #719fd1 95%,
                                     #719fd1 100%);

  background-size: 100% 100%;
}

meter::-webkit-meter-optimum-value:hover {

  background-image: linear-gradient( 90deg,
                                     #8bcf69 20%,
                                     #e6d450 20%,
                                     #e6d450 40%,
                                     #f28f68 40%,
                                     #f28f68 60%,
                                     #cf82bf 60%,
                                     #cf82bf 80%,
                                     #719fd1 80%,
                                     #719fd1 100%);

  transition: width .5s;
  width: 100% !important; /* !important keyword used to override the inline style in ebkit browsers. */
}

meter::-moz-meter-bar {

  box-shadow: 0 5px 5px -5px #999 inset;

  background-image: linear-gradient( 90deg,
                                     #8bcf69 5%,
                                     #e6d450 5%,
                                     #e6d450 15%,
                                     #f28f68 15%,
                                     #f28f68 55%,
                                     #cf82bf 55%,
                                     #cf82bf 95%,
                                     #719fd1 95%,
                                     #719fd1 100%);

  background-size: 100% 100%;
}

p {

  margin: 0 auto ;
  width: 550px;
  line-height: 2.5;
}

.free-space {

  float: right;
}

.swatch {

  margin: 0; padding:0;
  margin: 5em auto;
  list-style-type: none;
  width: 550px;
  display: block;
  position: relative;
}

.swatch::before {

  content: '';
  width: 100%;
  height: 10px;
  outline: 0px solid #000;
  position: absolute;
  top: -20px;
  left: 0;
  border-radius: 2px;

  background-image: linear-gradient( 90deg,
                                     #8bcf69 20%,
                                     #e6d450 20%,
                                     #e6d450 40%,
                                     #f28f68 40%,
                                     #f28f68 60%,
                                     #cf82bf 60%,
                                     #cf82bf 80%,
                                     #719fd1 80%,
                                     #719fd1 100%);

}

.swatch__elem {

  outline: 0px solid #c00;
  float: left;
  width: 110px;
  padding-left: 5px;

  -webkit-box-sizing: border-box;
     -moz-box-sizing: border-box;
          box-sizing: border-box;
}

.used-space {

  display: block;
  line-height: 2;
  font-size: 85%;
  color: #666;
}

.meter-gauge {

    border: 1px solid #ccc;
    border-radius: 3px;

    background-color: whiteSmoke;
    box-shadow: 0 5px 5px -5px #333 inset;

    width: 550px;
    height: 25px;

    display: block;
}

.meter-gauge > span {

  height: inherit;
  box-shadow: 0 5px 5px -5px #999 inset;

  background-color: blue;
  background-image: linear-gradient( 90deg,
                                     #8bcf69 5%,
                                     #e6d450 5%,
                                     #e6d450 15%,
                                     #f28f68 15%,
                                     #f28f68 55%,
                                     #cf82bf 55%,
                                     #cf82bf 95%,
                                     #719fd1 95%,
                                     #719fd1 100%);

  background-size: 100% 100%;

  display: block;
  text-indent: -9999px;
}
</style>
</head>
<body>
    <h1>OSX-style Disk Usage <xmp>..using html5 <meter></xmp></h1>

<p>
  Macintosh HD <span class="free-space">64.54 GB free out of 120.47 GB</span></p>

<meter value="55.93" min="0" max="120.47" title="GB">
  <div class="meter-gauge">
    <span style="width: 46.42%;">Disk Usage - 55.93GB out of 120GB</span>
  </div>
</meter>

<ul class="swatch">
  <li class="swatch__elem">Audio <span class="used-space">670.5 MB</span></li>
  <li class="swatch__elem">Movies <span class="used-space">10.1 GB</span></li>
  <li class="swatch__elem">Photos <span class="used-space">25.19 GB</span></li>
  <li class="swatch__elem">Apps <span class="used-space">19.31 GB</span></li>
  <li class="swatch__elem">Other <span class="used-space">660.5 MB</span></li>
</ul>

</body>
</html>
အထက်ပါ code က browser မှာ ဆိုရင် အောက်ကလို မြင်ရပါမယ်။
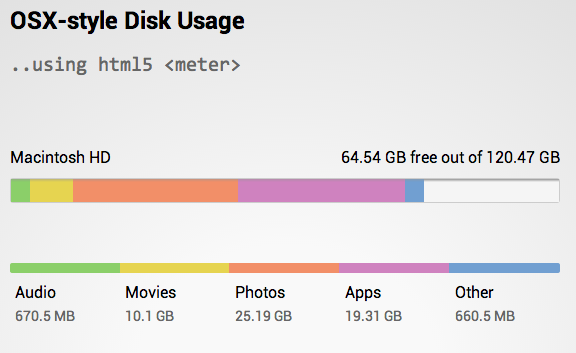
Figure 5-22
background image ကို linear-gradient အသုံးပြုပြီး meter နဲ့ ဖော်ပြထားတဲ့ example ကောင်း တစ်ခုပါ။
အခု ဆိုရင်တော့ image နဲ့ ပတ်သက်ပြီး သိသင့်သိထိုက်သလောက် သိသွားပါပြီ။ နောက်တစ်ခန်းမှာ ကျွန်တော်တို့တွေ links တွေ ချိတ်ဆက်တဲ့ အကြောင်းကို လေ့လာကြည့်ရအောင်။